XEBEC Brush™ Surface
Ideal for deburring, cutter mark removal and surface polishing
Applicable equipment

Machining center

Combined lathe

Special machine

Robot

Rotary tool
(electric)

Rotary tool
(pneumatic)
Tool composition
Brush and sleeve are sold separately.
Assemble brush and sleeve before use.

Brushes
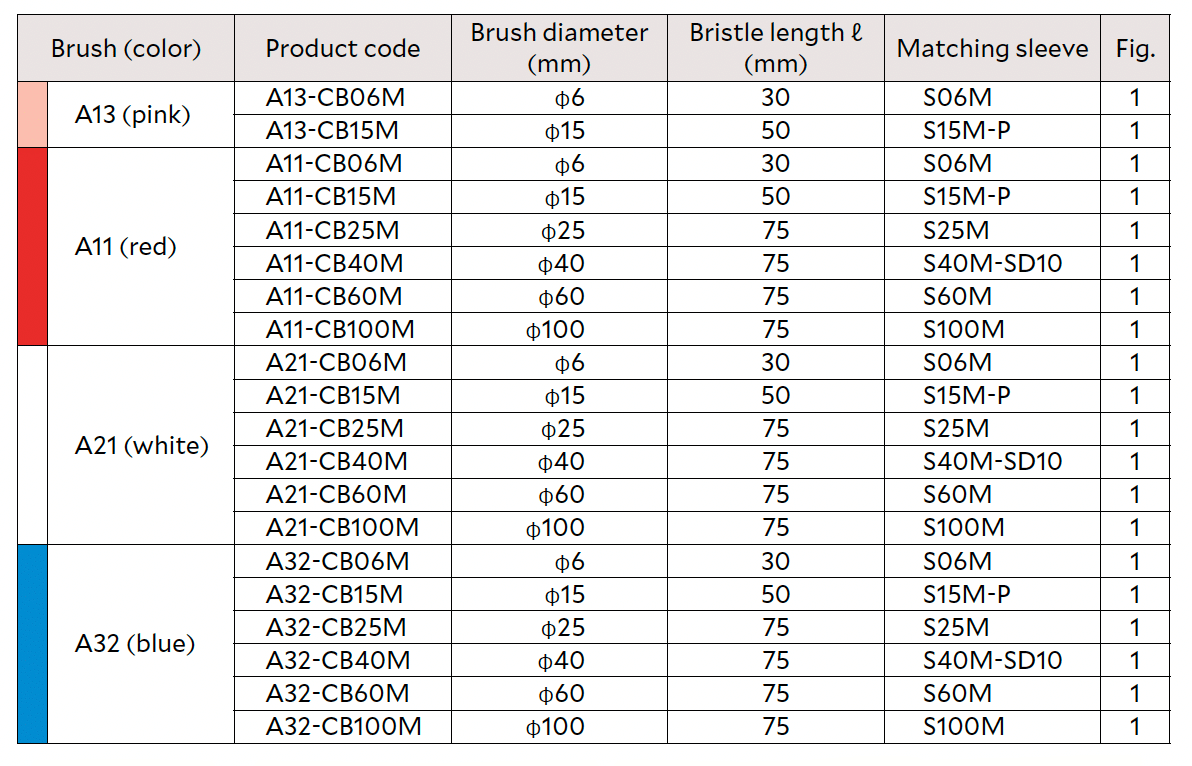
- Bristle bundles are embedded in a single line on the periphery (except for φ6 type).
- Brush size is approximate as the tip expands with rotation.
- Brushes larger than φ100 are available by special order. Refer to page 10.

Sleeves

- Overall length L is sleeve length not including brush projecton.
- The case of the S15M-P is made of fiber-reinforced plastic (FRP).
Applications
Higher quality automated deburring
Cylinder head
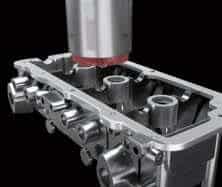
Before
Abrasive nylon brush was used.
It was time-consuming and not
able to remove all burrs.
After
All burrs are removed by
high grinding power. Quality
is stable. The cycle time is
shortened by a high feed rate.
Material: Aluminum
Follows: Face milling
Tool: A11-CB100M
Automation of time-consuming polishing
Metal mold
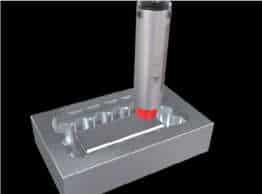
Before
40 minutes hand polishing per
workpiece. Uneven quality
resulted in complaints.
After
Shortened the polishing time to
one minute per workpiece by
automation. Achieved
Material: Hard material
Follows: End milling
Tool: A11-CB25M
How to use
Instruction manual download
Rotational speed
Recommended parameters differ depending on brush size.
Refer to the chart below for starting parameters for each
brush size.
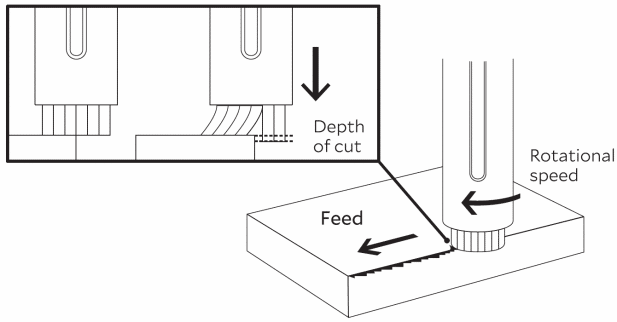
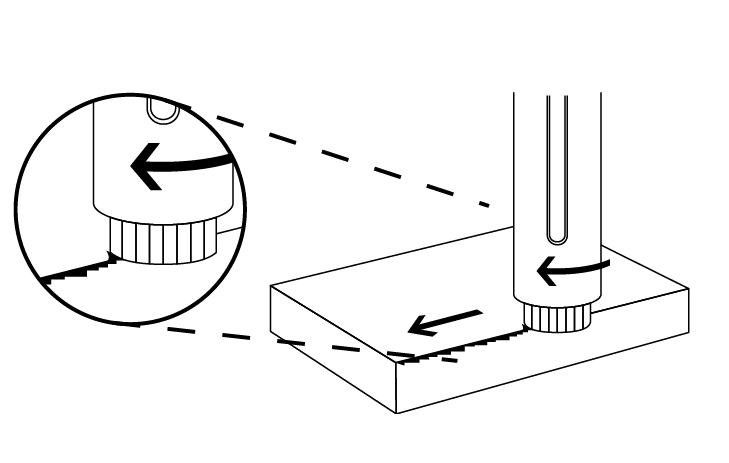
Rotational direction
Set the rotational direction so that the brush pushes the
burrs up from below.

Starting parameters

Plastic workpieces may deform or discolor. If this occurs, reducing rotational speed to approximately 10% of the starting parameter may solve the problem.
Processing conditions
Set the processing conditions depending on the purposes, deburring or cutter mark removal and polishing.
The 3 parameters of basic processing conditions are shown below.
1. Rotational speed 2. Depth of cut 3. Feed rate
How to set processing conditions for deburring
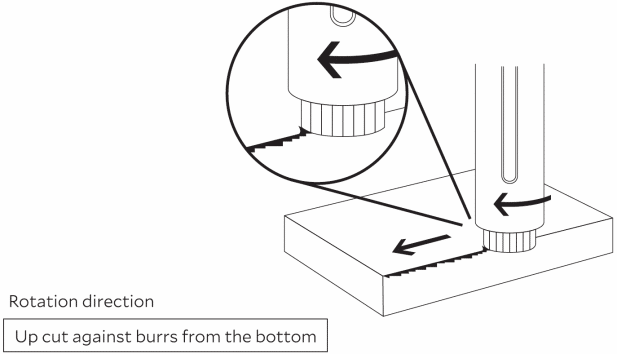
Rotational direction
Rotational direction of the Brush has a significant impact on the deburring capability.
For burrs in horizontal direction (i.e. side burr) generated after milling, machining must be done by up cut whereby the brush pushes upward against the burrs from the bottom.
When down cutting, there is a possibility that the burrs may not be removed properly because the burrs may get bent and stuck to the surface.
For vertical burrs (i.e. top burrs), there is no significant difference by rotational direction.
How to adjust
If burrs remain
For horizontal burrs, up cut is recommended so that the brush tip pushes up the burrs.
If the edge is too rounded
To make sharp edge, increase the feed rate in 1,000mm/min increments within the range where burrs can be removed.
Increasing the feed rate also helps to reduce the cycle time.
Decrease the rotational speed in 10 to 20% increments within the range where burrs can be removed.
The grinding power of the Brush : Blue > White > Red > Pink
Select Brush color based on the workpiece material and burr root thickness.
To extend tool life
Increase the feed rate in 1,000 mm/min increments within the range where burrs can be removed.
Decrease the rotational speed in 10 to 20% increments within the range where burrs can be removed.

If the surface becomes rough
Change the Brush with higher edge quality.
Edge quality of the Brush: Pink > Red > White > Blue
Make sure to select appropriate Brush color based on the workpiece material and burr root thickness.
To improve surface roughness
Make sure to select appropriate Brush color.
Edge quality of the Brush : Pink > Red > White > Blue
The tool can be used for both dry and wet (oil-based and water-soluble) machining.
Wet machining may improve surface roughness and tool life.
When comparing in the same cycle time, increasing the number of passes makes bigger difference than decreasing feed rate.
Maintenance
Truing
When the brush is worn out unevenly, you can form the tip of the brush using a diamond disc blade.


Truing by a drilling machine
Truing by a lathe
If you want to cut off the brush, cut from the side of the brush using a diamond disc blade.
Operation safety measures
Always wear protective goggles, gloves and masks when operating the tool.
Wear long sleeved clothing and close the cuffs and outerwear sleeves to minimize skin exposure.
Cutting particles and burrs may scatter within an area around the work as the brush rotates.
Stay clear of this area.
Follow the precaution in use and safety measures for operators above without fail.
If you fail to observe them, there are following risks.
*A tool or a part of tool may crack, drop off, distort or break.
*Broken pieces of a tool or grinding dust may stick into your skin, or at worst stick into yours eyes, causing blindness.
*Dust generated by machining process may bring up skin irritancy or allergy.
