XEBEC Floating Holder™ Straight Shank Type
The built-in spring helps to maintain stable load, contributing to consistent edge quality and reduction of the frequency to adjust the depth of cut.
Applicable equipment

Machining center

Combined lathe

Special machine

Robot

General purpose lathe with milling function

Rotary tool
(electric)

Rotary tool
(pneumatic)
| Product code | Target brush diameter (mm) |
Diameter for the sleeve shank (mm) |
Maximum rotational speed (min-1) |
Accessories | Fig |
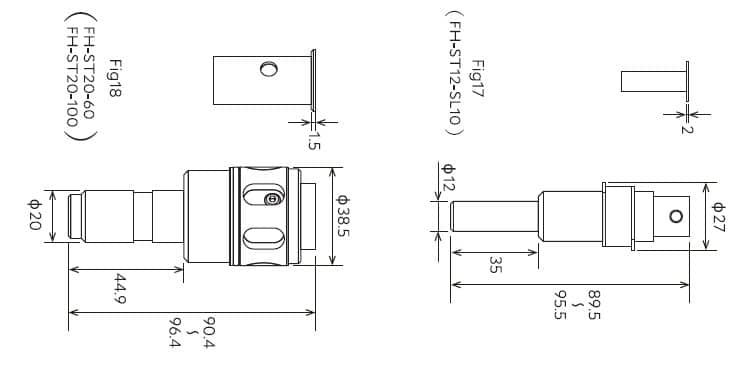
| FH-ST12-SL10 | φ6 | φ6(with the supplied bush ①) | 10000 | ①φ6 Bush ②φ8 Bush ③Low-pressure spring ④Standard spring* ⑤High-pressure spring *Installed when shipped |
17 |
| φ15 | φ6(with the supplied bush ①) | 6000 | |||
| φ25 | φ8(with the supplied bush ②) | 5000 | |||
| φ40 | φ10 | 3000 | |||
| FH-ST20-60 | φ60 | φ12 | 2000 | φ12 bush | 18 |
| FH-ST20-100 | φ100 | φ16 | 1200 | φ16 bush | 18 |
| Spring type | Outer diameter (mm) |
Spring constant (N/mm) |
Overall length (mm) |
Load by stroke (N) | ||
| 0 mm | 6mm | |||||
| Standard spring | Installed | φ10 | 0.3 | 40 | 4.5 | 6.3 |
| Low-pressure spring | Attachment | φ10 | 0.3 | 30 | 1.5 | 3.3 |
| High-pressure spring | Attachment | φ10 | 0.55 | 39 | 7.2 | 10.5 |
| Maximum load spring | Sold separately | φ10 | 3.03 | 30 | 15.2 | 33.4 |
○ Apply the tool vertically when making it engaged with workpiece.
○ It can not be used if there are intermittent machining areas or protrusions.
○ In the case of horizontal machining center, telescopic function may not work if spring load is low.
The tool can basically be used for workpieces that can be processed with XEBEC Brush Surface.
Do not use on intermittent part in which the brush would fall or when there is an obstacle.

When using the XEBEC Floating Holder, follow the usage instructions below.
1. Approach the tool from above to the workpiece while not in motion.
2. Set the depth of cut and make the spring contracted.
3. Rotate the tool and start feeding.
4. Stop rotation and feeding of the tool when machining is completed.
5. Remove the tool upward.

FH-ST12-SL10
FH-ST12-SL10 can be assembled in S40M-SD10 with shank dia. 10mm when bushing is not attached.
Also, S06M and S15M with shank dia. 6mm, and S25M and S40M with shank dia. 8mm can be assembled using the supplied special bush.
Align shank-fastening screw hole with bushing hole, insert special bushing as far as it will go, then secure the shank-fastening screw.

FH-ST12-SL10 Replacement of the spring
You can replace the spring to change the cutting load of FH-ST12-SL10 according to your desired machining quality.
Standard-load spring is built in when delivered.
The storage area of the spring is φ10.5 × 25 to 19 (6mm sliding).
Therefore, if the spring is φ10 and can be used in the range of 25mm to 19mm, it can be replaced.
In addition, we also offer springs whose load is higher than that of the high-load spring (0.72 to 1.05kgf), which maximum load of 1.52 to 3.34kgf. Please contact us for further details.
| Spring type | Outer diameter (mm) |
Spring constant (N/mm) |
Overall length (mm) |
Load by stroke (N) | ||
| 0mm | 6mm | |||||
| Standard spring | Installed | φ10 | 0.3 | 40 | 4.5 | 6.3 |
| Low-pressure spring | Attachment | φ10 | 0.3 | 30 | 1.5 | 3.3 |
| High-pressure spring | Attachment | φ10 | 0.55 | 39 | 7.2 | 10.5 |
| Maximum load spring | Sold separately | φ10 | 3.03 | 30 | 15.2 | 33.4 |
1. Remove the C-shaped retaining ring 2.
*Use the snap ring pliers for C type internal ring (C-shaped retaining ring size: 20mm)

2. Remove the steel ball cap ring retaining the steel balls and take out the steel balls from the main unit. (2 locations)
*Be careful not to lose the steel balls as they are small.

3. Remove the tool holding portion from the main unit and take out the spring.
Sparingly apply grease to the sliding portion (tool holding portion), re-attach the spring and return the sliding portion to the unit.
*Align the boat-shaped groove of the tool holding portion with the hole in the cap screw retaining the steel ball, which is on the main unit of the floating holder.
*Check that there is no dirt, etc. adhering within the tool holding portion or within the boat-shaped groove.
*Recommended grease : Lithium soap grease (NLGI # 2)

4. Insert the steel balls (2 locations), attach the steel ball cap ring retaining the steel balls, and then fit the C-shaped retaining ring 2 into the groove for this ring.
*Use only XEBEC-designated steel balls. Dangerous operation failure or tool damage may otherwise occur.
5. After assembling the parts, press the bottom of tool holding portion with your fingers, and check to see that tool holding portion slides 6mm.
FH-ST20

Example of attaching to FH-ST20 and special bushing

Align the shank-fastening screw hole with bushing hole, insert the special bushing as far as it will go, then secure the shank-fastening screw.
FH-ST20-60 is made for XEBEC Brush Surface of dia. 60mm with shank dia. 12mm.
FH-ST20-100 is made for XEBEC Brush Surface of dia. 100mm with shank dia. 16mm.
| Load adjustment | Load by stroke (N) | Adjustment screw position | |
| 0mm | 6mm | ||
| Standard float | 2 | 6 | When load adjustment screw 2 is at the end of the shaft. |
| Higher float | 6 | 10 | When load adjustment screw 2 is at the back of the shaft. |


The following drawing (the location of adjustment screw #1) shows when adjustment screw 2 is locked after it is loosened and adjustment screw 1 is tightened in the end.

- Loosen the adjustment screw 1.
2. Tighten the adjustment screw 2.
3. Tighten the adjustment screw 1.


The following drawing (location of adjustment screw #2) shows when adjustment screw 1 is locked after it is loosened and adjustment screw 2 is tightened in the end.
| Load adjustment | Load by stroke (N) | Adjustment screw position | |
| 0mm | 6mm | ||
| Standard float | 2 | 6 | When load adjustment screw 2 is at the end of the shaft. |
| Higher float | 6 | 10 | When load adjustment screw 2 is at the back of the shaft. |
*Spring pressure is set to minimum when delivered.
- Loosen the lock screw from the tip, using a 3mm hexagonal wrench.
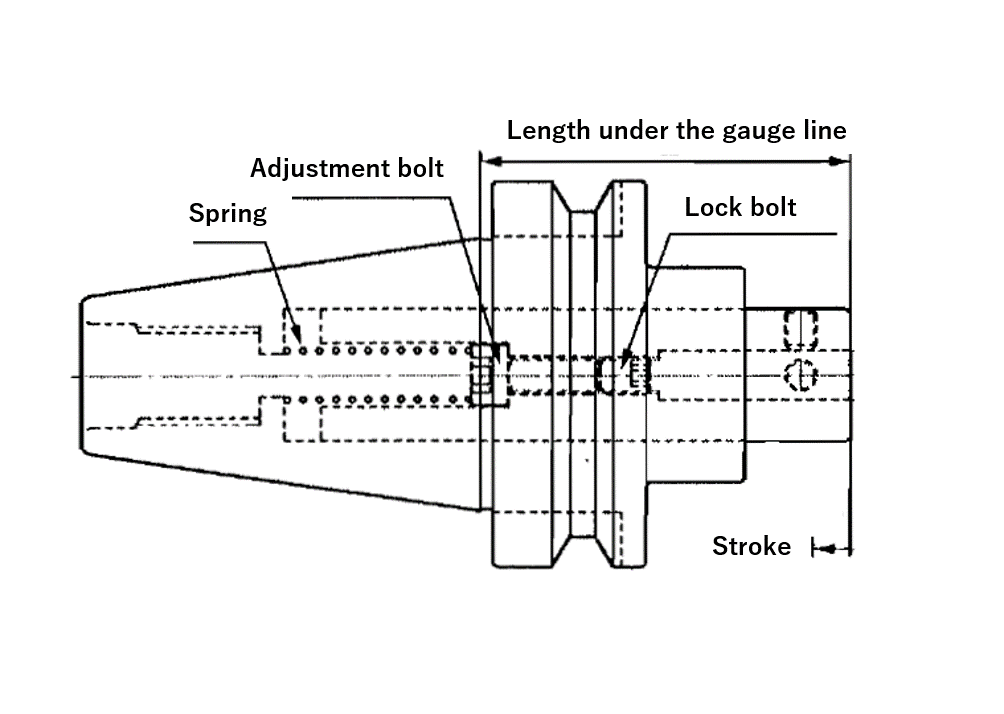
2. Remove the pull screw and move the adjustment screw to adjust the spring pressure, using a 5mm hexagonal wrench.


Minimum spring pressure is indicated when the adjustment screw is locked-off clockwise. Spring pressure is set to minimum when delivered.
Spring pressure increases as the adjustment screw is turned anti-clockwise. 6 full anti-clockwise turns will bring spring pressure to maximum.
Please be aware that more than 6 full turns will cause the spring to stick, hindering the floating function.
Maintenance
FH-ST12-SL10
*Use the snap ring pliers for C type internal ring (C-shaped retaining ring size: 20mm).

*Be careful not to lose the steel ball as it is small.
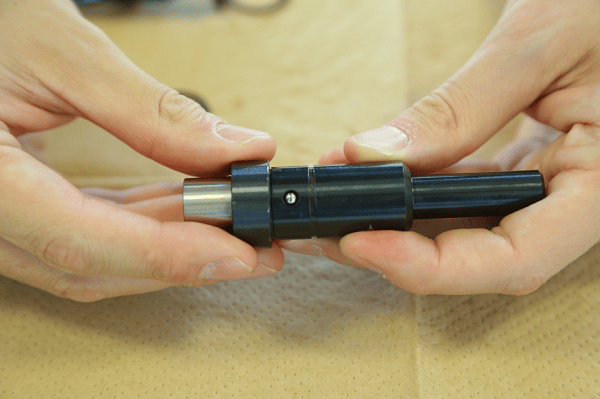

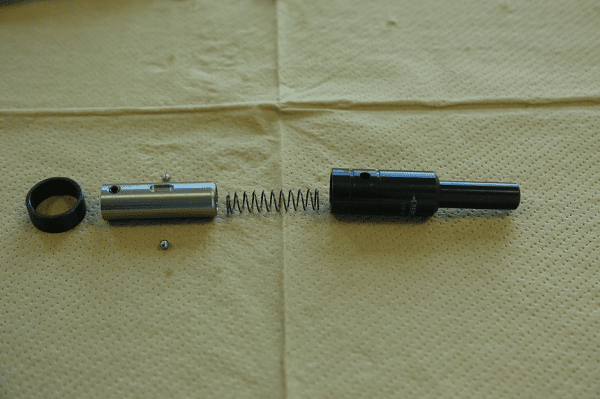
*Align the boat-shaped groove of the tool holding portion with the hole in the cap screw retaining the steel ball, which is on the main unit of the floating holder.
*Check that there is no dirt, etc. adhering within the tool holding portion or within the boat-shaped groove.
*Recommended grease : Lithium soap greas (NLGI#2)
FH-ST20
The sliding portion may not move smoothly when dirt is stuck inside or grease is insufficient.
Please carry out maintenance following the instruction below.

2. Remove the set screws at 2 locations.
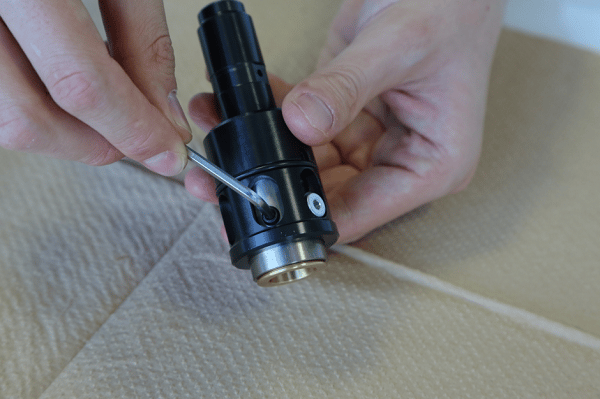
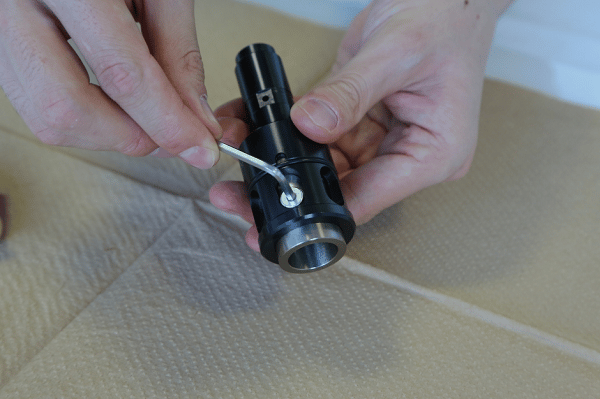
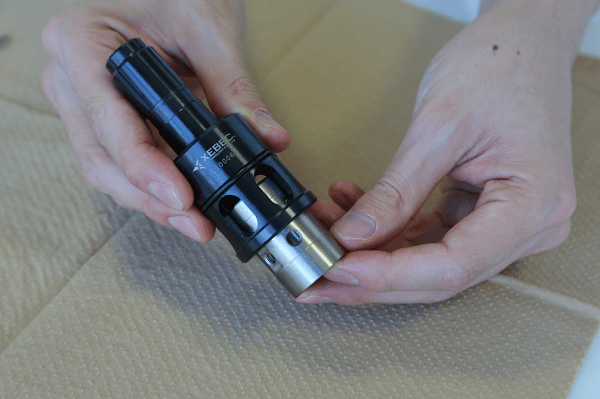
*Too much grease may influence movement of the slider at low load.
*The outer circumference of the slider and inner wall of the body should be smoothened with a grinding film of about #5000 when they have any roughness due to scratching.
*Recommended grease : Lithium soap grease (NLGI#2)
* It is recommended to periodically carry out maintenance. The interval of maintenance varies depending on the frequency of operation.
* If you leave the floating holder unused for a long period of time, make sure to perform maintenance before storing the floating holder. Otherwise, the sliding portion may stick.
